
Most editors will edit a manuscript using Word’s nifty Track Changes feature. This allows authors to see exactly what edits have been made to their work and gives them the power to reject or accept the changes.
Updated May 2024
However, if you’ve not used Track Changes before, you might feel a little overwhelmed by it!
Don’t worry. It’s not as complicated as it first seems.
What are tracked changes?
Okay, let’s start with the basics.
Track Changes is a feature in Microsoft Word that allows you to keep track of the changes you make to a document – or, in other words, the edits you make to a manuscript.
Each change can be either ‘accepted’ or ‘rejected’. When a tracked change is accepted, the edit is assimilated into the document. If it is rejected, the text reverts back to how it was originally.
The author gets to decide which changes they accept based on whether they agree with your edits.
How to turn the Track Changes feature on/off
It’s possible that you and your client may not be using the same version of Word. If this is the case, the aesthetics of the feature will be slightly different. However, once you’ve found Track Changes in the menu, it works in pretty much the same way in all versions.
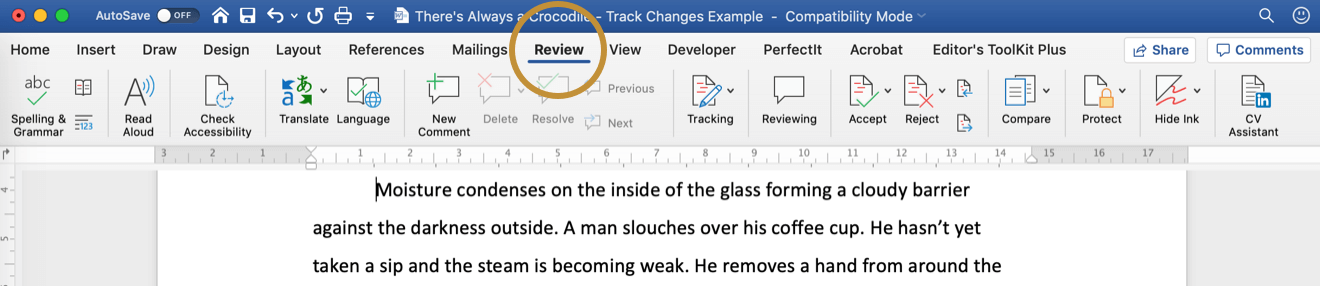
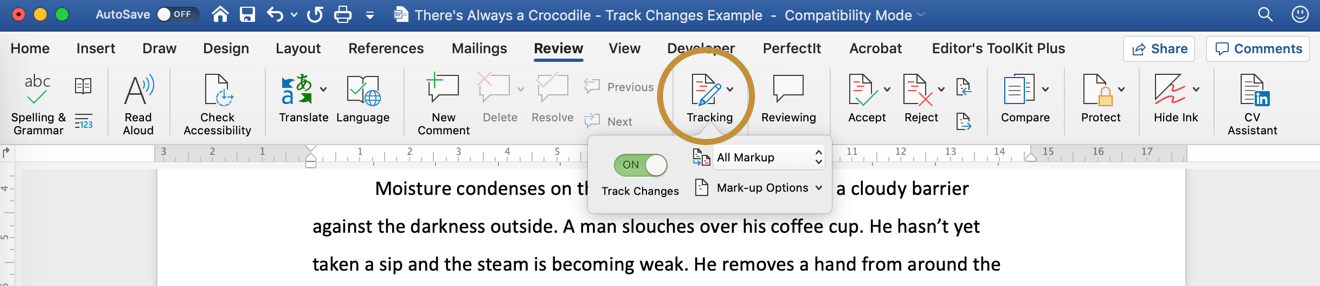
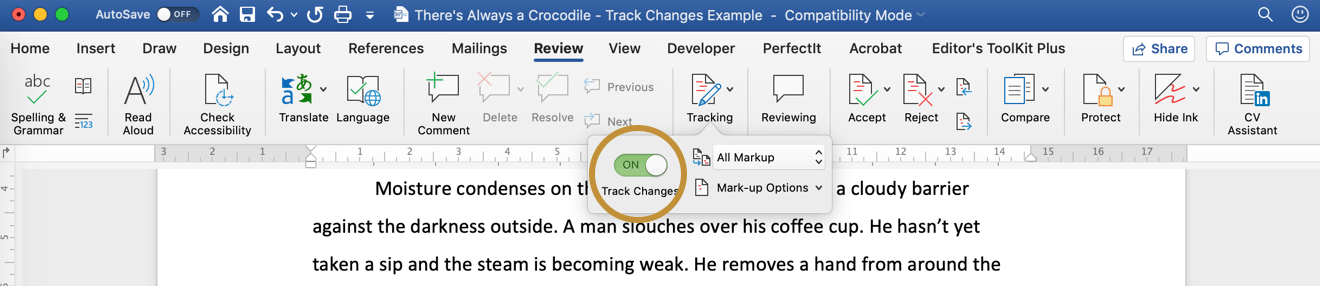
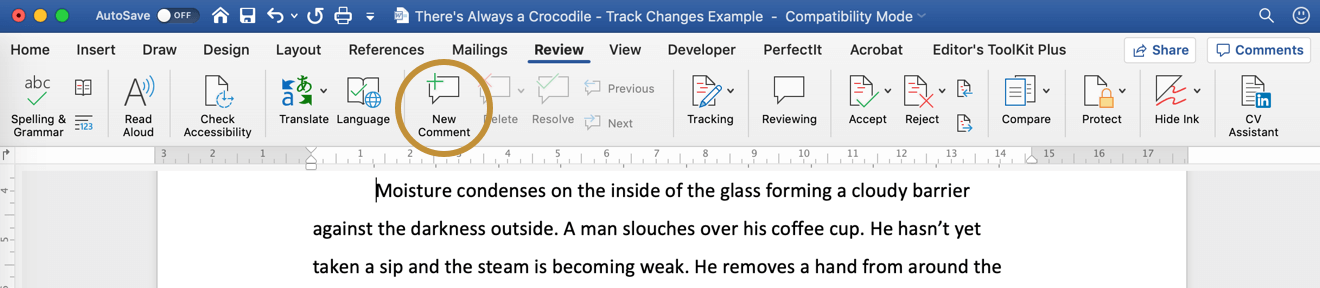
For most versions of Word, you simply need to go to the Review tab to find Track Changes.
Click the button and the feature will be switched on!
In this guide, I’ll be using Microsoft 365 Word for Mac.
What tracked changes look like
When you add text to the document, the new text will appear in a different colour and will be underlined. The colour of the insertions will depend on your settings, which are local to your computer. On my computer, I’ve kept the default red.
When you delete text from the document, either the text will be moved to the side of the document or it will appear crossed out in the body of the text. How it appears to you will depend on your default or customised settings, local to your computer. On my computer, the deleted text is pulled to the side.
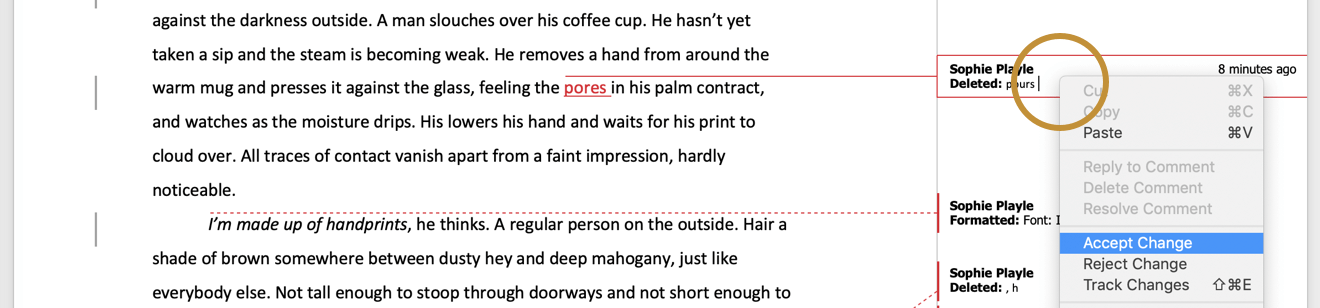
You’ll see a thin vertical line on the left of the text whenever a change has been made. This is a useful feature because sometimes it’s easy to miss small changes in the text, such as a deleted comma.
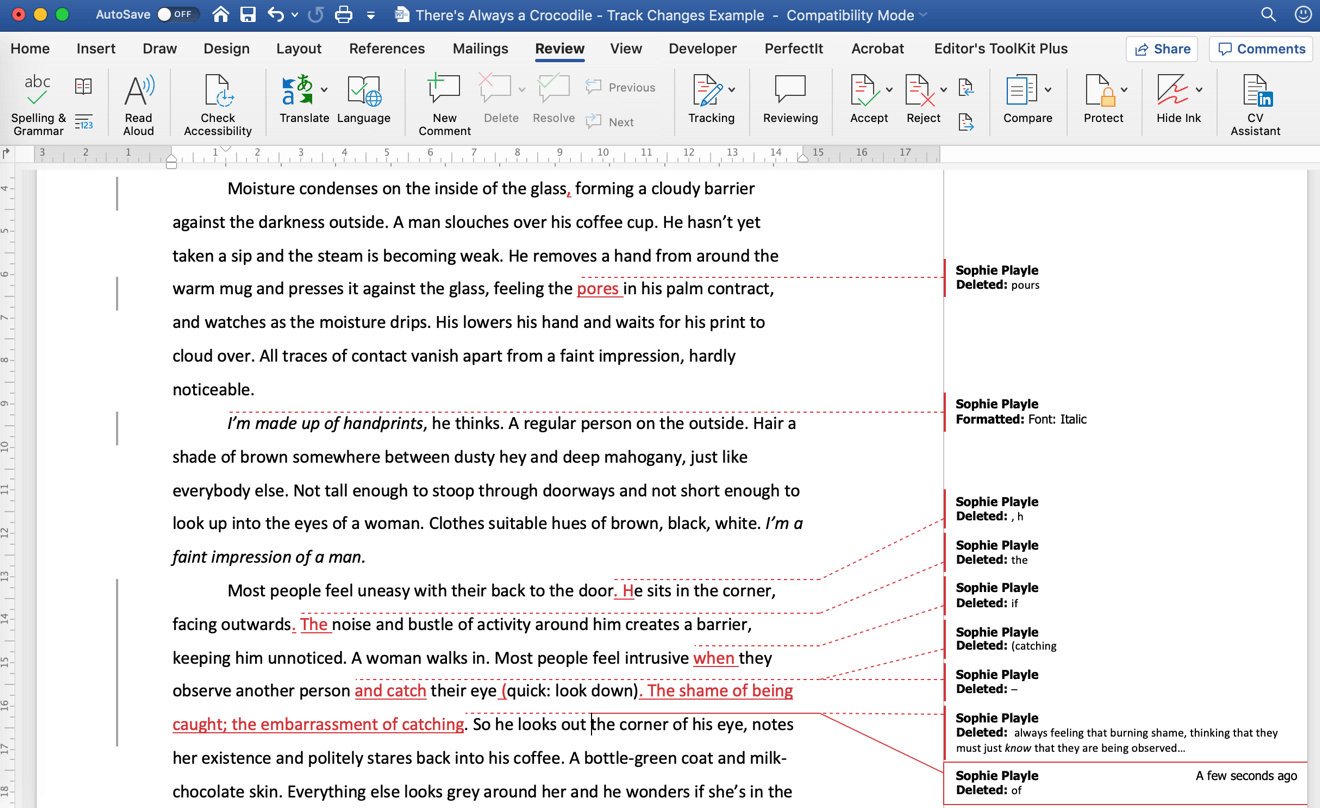
Notice in the example above that when text is inserted, it appears in red. Notice, too, that when text is deleted, it’s pulled out to left-hand side of the document; a thin red line connects the balloon to where the text has been deleted from.
With both inserts and deletions, a thin vertical line appears down the right-hand side of the document to signify that a change has been made on a particular line.
In some places it appears that both an insertion and a deletion has taken place – for example, when changing ‘pours’ to ‘pores’ the original word is deleted and the new word is inserted, so you can see both a red insertion and that text has been deleted from the same place.
You can also see my name above every change. If more than one person works on a document with Track Changes turned on, this means you can see who had done what to the document.
Though I don’t show it here, text that has been moved from one place to another will show up in a different colour. On my computer, moved text appears in green.
How to accept or reject a tracked change
There are a few ways to do this, all of them nice and simple.
As the editor, you might want to ‘accept’ a change you meant to make ‘silently’ (i.e. without Track Changes being switched on) or you might want to ‘reject’ an edit you’ve changed your mind about.
You’ll also need to know how to advise your author clients how to accept and reject changes.
You can accept or reject an individual change by right clicking on the change (either the red inserted text or the deleted text at the side of the document) and selecting either Accept Change or Reject Change.
Alternatively, you can navigate through the tracked changes using the Previous and Next buttons under the Review tab and use the Accept or Reject buttons. When you use the Accept or Reject buttons, you’ll automatically be taken to the next change to review.
You also have the option of accepting or rejecting all the changes in a document in one fell swoop. You can do this by clicking on the little arrow next to the Accept or Reject buttons and then selecting Accept/Reject All Changes in Document. Be careful, as this could be irreversible!

Understanding the Comments feature
An important part of the Review tab is the Comments feature, which is often used at the same time as Track Changes. If you want to comment on the text, simply highlight it with your cursor and click New Comment. (It might be slightly different for different versions of Word.)
A comment balloon will appear in the right-hand margin of the document – where any tracked changes appear, too – and you can write your comment here.

Use the Comments feature to:
- offer short explanations of your edits
- request the author to check that their intended meaning has been retained
- leave a query for the author that requires their input or
- add a note of praise.
You might want the author to reply to some of your comments. They can respond directly in the manuscript by inserting another comment.
To do this, they need to click on the original comment, and then click on the New Comment button to create a new comment directly below the original. Their comment boxes may appear in a different colour and, depending on their settings, contain their name, too.
Understanding and using different document views
Word displays tracked changes by default once the feature is activated, but you can change how you view a document that contains tracked changes.
Under the Review tab, you’ll see a drop down menu that says All Markup (the default on my computer). If you click it, you’ll see you have some more options: Simple Mark-up, No Markup, and Original – all quite self-explanatory.

Important: Changing a document’s view on your computer does not change how someone else sees the document on their computer.
If you select No Markup without having accepted or rejected the tracked changes and deleting any comments, the file will still retain all of the tracked changes and comments, even though you can’t see them. All the tracked changes and comments will reappear as soon as you reopen the file on your computer or when someone else opens it afresh on their computer.
Changing your document view might be useful if you want to see only comments or only tracked changes, for example, but I recommend you provide your client with documents containing various views so they don’t have to fiddle around with this setting!
Recommended method: three file types
When you return an edited manuscript to an author, I recommend providing three separate files:
- Full Edit – The first file contains all the edits made visible through the Track Changes feature so the author can see exactly what’s been done.
- Comments Only – The second file has all the edits assimilated into the text, but the comments are still visible so the author can easily find and address any issues.
- Clean – The third file has all the edits assimilated into the text and all the comments deleted so the author can easily see a ‘clean’ version of the edited manuscript.
Not all editors work this way, and that’s fine.
But I believe this is the most useful method. It enables the author to have access to both the edits and the edited manuscript without having to know too much about the technical know-how of using Track Changes.
How authors should review their edited manuscript
So now you’ve conducted your edit using the Track Changes and Comments features of Word. If you hand these files to your client with no instruction, they might be very confused about what to do (and even too embaressed to ask you), so it’s always worth drafting some instructions to send along to your client.
Here’s what I recommend.
There are two ways an author might decide to review their edited manuscript:
- Look at every tracked change individually and decide whether to accept or reject it while addressing any comments and deleting the comment balloons as they go.
- In the manuscript file that has all the changes accepted with just the comments remaining (see method above), the author should address any issues raised in the comments, deleting the comment balloons as they go. After that, they should read through the manuscript carefully. If they spot anything odd or something doesn’t seem right, they should crosscheck it with the fully marked-up file and change their current version to how they want it to be.
Generally, I recommend the second method because it’s less overwhelming.
If there have been a lot of changes made to a manuscript (for example, if sentences have often been recast for better flow or a recurring grammar issue has been corrected), I highly recommend the author follows the second method.
Sometimes, too, when there’s too much markup or too many comments to fit along the right-hand side of the page, a little ellipsis (…) will appear next to some balloons to show that there’s more information, just not enough room to show it.
You can click on the ellipsis to see the rest of the balloon text, which will appear in a new separate reviewing panel. Really, an author only wants to be dealing with this if absolutely necessary because it’s such a pain (and will slow down their computer), so following method two above really can make it easier!
If you decide to provide the client with just the one document to work with, I recommend suggesting the author make a copy before they start accepting or rejecting changes – just incase something goes wrong. So that they’re left with a clean final draft, they should make sure they’re viewing No Markup, all changes have been accepted or rejected, and all comment balloons have been deleted. Voila, they have their final draft.
I hope that’s helped!


